
Das MMP1 Studio Monitor Management System liefert essentielles Audio-Processing für DAW-basierte Studios in einem flexiblen, fantastisch klingenden und platzsparenden Gerät, das effizientes Systemmanagement mit einem überraschend moderaten Preis vereint.

Wichtigste Funktionen
Die Universallösung für DAW-Basierte Studios
Das Gebiet der Audioproduktionen entwickelt sich rasant. Viele der Funktionen, die früher noch vom Mischpult übernommen wurden, sind heute in leistungsfähige DAW-Systeme integriert. Doch selbst die modernsten computerbasierten Produktionsumgebungen erfordern meistens Peripheriegeräte, die das reibungslose Arbeiten im Studio ermöglichen, wie zum Beispiel geeignete Monitorcontroller. Immersive Audioformate stellen diese Geräte vor neue und immer komplexere Herausforderungen. Yamaha hat viel Zeit und Arbeit investiert, clevere Ansätze für das Lautsprechermanagement im Studio zu entwickeln und bietet mit diesem neuen Monitorcontroller eine Universallösung für nahezu jede Studioumgebung.
Das MMP1 Studio Monitor Management System liefert essentielles Audio-Processing für DAW-basierte Studios in einem flexiblen, fantastisch klingenden und platzsparenden Gerät, das effizientes Systemmanagement mit einem überraschend moderaten Preis vereint.
ab November 2017 verfügbar
-
Umfangreiches Lautsprechermanagement
Bis zu 32 Kanäle starkes Lautsprecherprocessing für viele Audioformate von Stereo bis Dolby Atmos inklusive Steuerung von Studiokommunikationswegen und externen Quellen.

-
Flexibles Bass-Management
Bassmanagement mit FIR- und IIR-Filtern, das flexibel über eine 32 x 32 Lautsprechermatrix konfiguriert werden kann

-
Herausragend präzise Lausprecherkalibrierung
Speaker Delays, EQ und weitere Einstellungsoptionen auf allen Kanälen

-
Komplett ausgestattete Kanalzüge
Acht Kanalzüge mit vier verschiedenen EQs, VCM Vintage-Kompressoren und vieles mehr für kraftvolles Processing auf kleinstem Raum

-
Funktionen für Aufnahmen in der Post-Produktion
Neben einer Reihe von Funktionen für Talkbacks, CUE-Wege und GPI/O, liefern Commentary-Funktionen erweiterte Unterstützung für Voice-Over-Recordings.

Signalfluss

Features
-
Fortschrittliches Lautsprechermanagement und Kommunikation
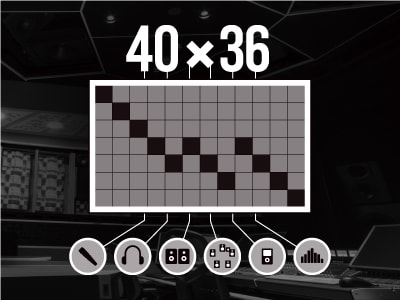
Herz des MMP1 ist eine 40 x 36 Kanal Quellenmatrix*, die nicht nur gängige Formate wie Stereo, 5.1 und 7.1 mit Leichtigkeit verwalten kann, sondern auch über genügend Kapazitäten für die permanent wachsende Welt der immersiven Audioformate wie zum Beispiel Dolby Atmos verfügt. Um eine möglichst breite Palette von Installationen zu bedienen, verfügt das MMP1 über acht Cue-Ausgänge und weitere acht Studiolautsprecher-Ausgänge, die für Kommunikation genutzt werden. Die umfassende Verwaltung der Monitoring-Ausgänge, der Cue-Wege und der Studiolautsprecher ermöglichen es, äußerst komplexe Signalwege im Studio zu realisieren.
*(32 Eingänge + 8 DSP-Kanäle) x (32 Ausgänge + Stereo-Downmix-Ausgänge + Stereo-Kopfhörer-Weg) @44.1, 48, 88.2 und 96kHz. 20 x 20 Kanäle @ 176.4 und 192kHz.
-
Flexibles Bassmanagement für jede Produktionsumgebung
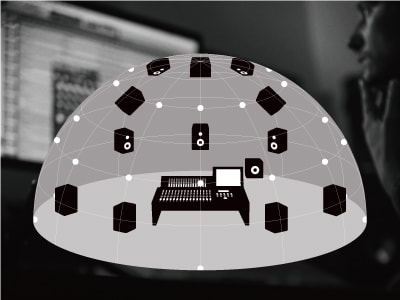
Bassmanagement wird weit verbreitet genutzt, um den tiefen Frequenzbereich der Studioabhöre zu kontrollieren, viele statische Systeme bieten allerdings nicht die Flexibilität, die für immersive Audioformate mit vielen Lautsprechern vonnöten sind. Anders als bei Systemen, die eine begrenzte Anzahl von Speaker-Layouts zur Verfügung stellen, besitzt das MMP1 eine dedizierte, frei konfigurierbare 32 x 32 Kanal Lautsprechermatrix* mit Frequenzweichen für Bassmanagement auf allen Kanälen. Dies ermöglicht ein umfassendes Optimierungswerkzeug für nahezu jede Studioumgebung.
Präzise, phasentreue FIR-Filter sind zusätzlich zu den Standard-IIR-Filtern verfügbar. Diese ermöglichen es, Interferenzen zwischen der Hauptabhöre und den LFE-Kanälen auf ein absolutes Minimum zu reduzieren. Das Ergebnis ist ein klares, präzise definiertes Klangbild.
*32 x 32 Kanäle @44.1, 48, 88.2 und 96kHz. 16 x 16 Kanäle @176.4 und 192kHz
-
Herausragend präzises Lausprechermanagement
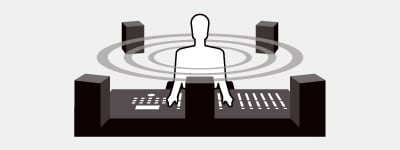
Das MMP1 stellt sich flexibel auf jede noch so komplexe Abhörsituation ein, angefangen bei der Quellenverwaltung, bis hin zur präzisen Raumkorrektur. Time-Alignment-Delays, Sechs-Band-Equalizer und Gain Trims sind für jeden der 32 Lautsprecher-Ausgangskanäle verfügbar. Das erlaubt die genaue Optimierung der Abhöre für jedes Format von Stereo bis Mehrkanal.
-
Komplett ausgestattete Kanalzüge
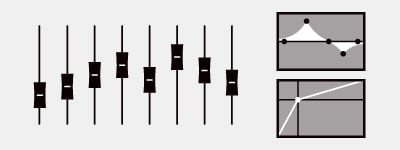
Acht Kanalzüge mit vier verschiedenen EQs, VCM Vintage-Kompressoren und vieles mehr für kraftvolles Processing auf kleinstem Raum
-
VCM Vintage Effekte
Der Kompressor in jedem Kanalzug ist Yamahas vielgelobter Comp260, eine aufwendig reproduzierte Emulation eines Kompressor-Klassikers aus den 1970ern. Der Comp260 liefert das Verhalten und den Klang des originalen VCA-Schaltkreises und seiner vertrauten RMS-Level-Detection.

-
Vier EQ-Algorithmen
Die Kanalzüge des MMP1 enthalten vier verschiedene EQ-Typen. Der „Precise“-Algorithmus ermöglicht sehr analytisches Arbeiten, der „Aggressive“-Modus liefert sehr musikalischen Sound, „Smooth“ klingt äußert natürlich. Des Weiteren gibt es einen „Legacy“-Modus, der den Klang und das Verhalten der Entzerrer aus digitalen Yamaha-Livemischpulten emuliert.
-
Funktionen für Aufnahmen in der Post-Produktion
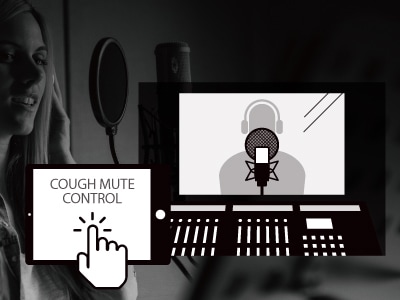
Neben acht Cue-Ausgängen und weiteren acht Studio-Lautsprecher-Ausgängen mit zwei Talkback-Systemen bietet das MMP1 eine Commentary-Funktion, die reibungslose Kommunikation mit Sprechern und Musikern ermöglicht. Sprechern und Künstlern kann eine Räuspertaste zur Verfügung gestellt werden, die per GPI-Interface an das MMP1 angeschlossen wird. Der Cough-Mute-Status ist im MMP1 Editor sichtbar und wenn die Räusperfunktion deaktiviert und das Mikrofon wieder live geschaltet wird, werden die Studiolautsprecher automatisch stummgeschaltet, um Rückkopplungen zu vermeiden.
-
Herausragende Klangqualität
Die Abhöre im Studio bestimmt, wie das Endprodukt einer Produktion klingen wird. Aus diesem Grunde müssen Klangqualität und die Präzision des Monitorsystems so nah wie möglich am Optimum liegen. Hochauflösender Sound stand in Yamahas Designphilosophie schon immer im Mittelpunkt und das ist auch beim MMP1 nicht anders. Der Zusammenstellung aller Komponenten und dem Design der Schaltkreise wurde dabei ebenso große Aufmerksamkeit geschenkt, wie der klanglichen Kalibrierung durch unsere erfahrenen Toningenieure. Das Resultat ist beispiellose Klangqualität, von der Sie sich selbst überzeugen sollten.
-
Intuitives Setup und einfache Bedienung
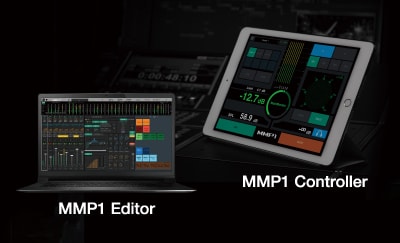
Zwei Softwareapplikationen ermöglichen ein stressfreies Setup und eine einfache Bedienung des Gerätes. Der MMP1-Editor* für Windows und Mac liefert alles von der Systemkonfiguration, über Dateiverwaltung bis hin zu klassischen Bedienfunktionen, ein Setup-Wizard erleichtert die Einrichtung. Nach der Konfiguration bietet die MMP1-Controller-App für das iPad bequeme und intuitive Steuerung aller essentieller Parameter.
*Der MMP1-Editor steht auf der Yamaha-Webseite zum Download bereit
** Die MMP1-Controller-App ist im Apple Appstore erhältlich
-
Nuage System Integration
The MMP1 can be controlled directly from the monitor section of Yamaha’s NUAGE DAW system. Monitor source selection, levels, downmix and dimmer switching, talkback, and other functions can be controlled directly from physical controls on a Nuage Master or Nuage Fader unit. And because these functions can be accessed even when there is no computer or DAW online, monitor section operation is as direct and immediate as on a mixing console.
-
TMC-1 Remote Control Support
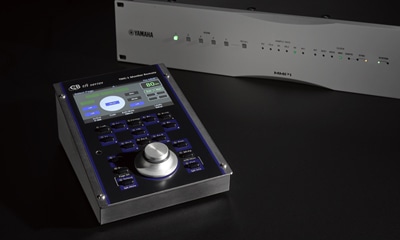
CB Electronics TMC-1 can be used to remotely control MMP1 monitor source selection, speaker system selection, levels, mute, and dim. Used in conjunction with the MMP1 Controller app for iPad, this provides convenient access to a wide range of detailed settings, for a more efficient, productive monitoring environment.
-
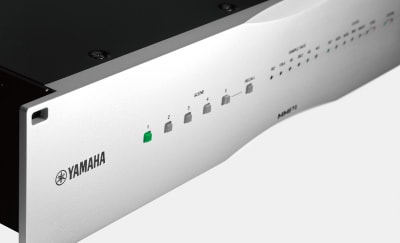
Sicheres und bequemes Systemmanagement
Drei Zugangsstufen bieten Sicherheit und Stabilität, selbst wenn das System vielen unterschiedlichen Nutzern zur Verfügung steht. 20 Szenenspeicher und die Snapshot-Funktion tragen zur einfachen Bedienung bei und erlauben es, Einstellungen schnell und einfach zurückzusetzen. Eine „All Mute“ Funktion für den Notfall kann sowohl vom Editor, per GPI oder vom Frontpanel aktiviert werden.

-
Zahlreiche Eingänge und Ausgänge, sowie Erweiterungsoptionen
Das MMP1 ist mit acht hochklassigen analogen Ein-und Ausgängen, sowie mit 16 Kanälen AES I/O ausgestattet. Des Weiteren liefert die Dante-Anbindung 64 Ein-und Ausgangskanäle über ein einziges Ethernetkabel. Dante ermöglicht außerdem den Transfer von Mehrkanal-Audio von und zu einem Computer*, so dass das MMP1 als Audiointerface benutzt werden kann.
*Der Computer muss mit einer Yamaha Dante Accelerator-Karte oder einer Dante Virtual Soundcard (DVS) ausgerüstet sein

-
Mehr als ein Monitorcontroller
Das MMP1 ist nicht nur ein Monitorcontroller für Tonstudios. Mit zwei kraftvollen Matrix-Mixern, einer Reihe von Effekten und einem 16-Pin GPI-Interface, das mit vielen externen Geräten kommunizieren kann, trägt es zur Effizienz und Benutzerfreundlichkeit in Broadcast-Umgebungen und anderen Anwendungsbereichen bei. Die redundante Stromversorgung sorgt dabei für die nötige Betriebssicherheit.

Systeme
Stereo (Audio Post)
In diesem Audio-Post-Produktionssystem sind drei Stereo-Monitorpaare im Einsatz. (Mid-Field, Near-Field und Small) Ein Talkback-Weg und ein Kopfhörer-Cue-Weg verbinden die Regie mit dem Aufnahmeraum. Die GPI-Schnittstelle des MMP1 wird zur Rotlichtsteuerung und für den Anschluss einer Räuspertaste genutzt.

Stereo (Music)
In diesem Audio-Post-Produktionssystem sind drei Stereo-Monitorpaare im Einsatz. (Mid-Field, Near-Field und Small) Ein Talkback-Weg und ein Kopfhörer-Cue-Weg verbinden die Regie mit dem Aufnahmeraum. Die GPI-Schnittstelle des MMP1 wird zur Rotlichtsteuerung und für den Anschluss einer Räuspertaste genutzt.

5.1 Surround
Zwei volle 5.1 Lautsprechersysteme (Main und Preview) sind im Regieraum verbaut, zusätzlich sind zwei Stereopaare im Einsatz (Near Field und Small). Separate Talkback-Mikrofone stehen für den Tontechniker und den Regisseur zur Verfügung. Drei Cue-Wege ermöglichen lokale und dezentrale Aufnahmen. Die analogen Ausgänge des MMP1 werden durch ein Dante-Interface erweitert, das eingebaute Bassmanagement des MMP1 optimiert die 5.1-Systeme.

Dolby Atmos 7.1.4
Ein vollständiges 7.1.4-Lautsprechersystem und zwei Stereo-Abhören (Near Field und Small) sind hier im Einsatz um in diesem Beispiel Mischungen für Dolby-Atmos zu ermöglichen. Zwei Talkback-Mikrofone stehen für den Engineer und den Regisseur zur Verfügung, während ein CUE-Weg den Kopfhörer im Aufnahmeraum speist. Die analogen Ausgänge des MMP1 werden durch ein Dante-Interface erweitert. Für die 7.1.4-Wiedergabe wird individuelles Bassmanagement auf die verschiedenen Surround-Zonen angewendet (Front, Left Surround, Right Surround, Top Surround). Das MMP1 wird in diesem Beispiel direkt aus der Monitorsektion des Nuage-Controllers gesteuert.

* Die technischen Daten können ohne vorherige Ankündigung geändert werden. Die abgebildeten Farben und Oberflächen können von den tatsächlichen Produkten abweichen.